

How to use PowerNotes
- Step 1: Install and enable the PowerNotes Chrome Extension
- Step 2: Go to any website or pdf and highlight some text
- Step 3: Put the highlight in a topic (it’s easy to add and customize topics)
PowerNotes helps with some of the most difficult and time consuming parts of online research: gathering and keeping track of source materials, staying organized, and creating a research outline. Here’s how PowerNotes does it:
- Capture text with the PowerNotes Chrome Extension
- Stay organized with custom topics
- Track your progress with the Extension sidebar
- Edit and approve citation info
- Review and reorganize your research with project outlines
- Manage your research with projects
Gathering and Tracking Research
To collect and organize research from online resources you will need to install and log in via the PowerNotes Chrome Extension.
With PowerNotes you can highlight and annotate almost any website or pdf. (Note that you won’t be able to highlight and annotate some websites that aren’t research focused, including Facebook, Gmail, and Google Docs.)
When you have found content that you want to save:
- Highlight it: the text you highlight will be saved – if you want to highlight 1 word or less, hold down control (for PCs) or command (for Macs) as you highlight
- Choose a topic: after text is highlighted, the topics menu will appear – the default topics are “Topic 1” and “Topic 2” – adding and editing topics is easy
- Add your notes: once you’ve selected a topic, the notes box will appear so you can take notes if you want
- Confirm citation info: click on the gray citation icon to review and edit citation info (you can skip this if you don’t need to cite sources)
Each highlight, along with the source link, and any notes you take are combined into a snippet, which you can edit and rearrange.
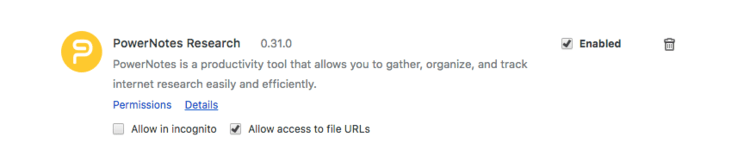
For PDFs, PowerNotes works on any non-scanned or OCR’ed materials. If you would like to use PowerNotes on a PDF that’s located on your computer’s hard drive, you will need to:
- go to (you can copy/paste this into your search bar): chrome://extensions/
- scroll to: PowerNotes and check the “Allow access to file URLs” box.
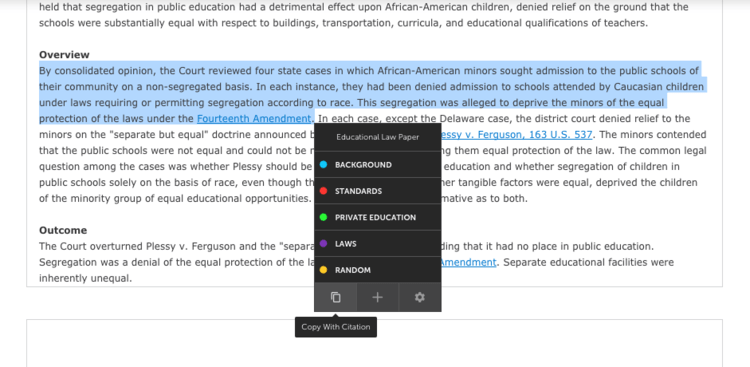
If you would like to copy a passage of text that you have highlighted, click the copy button in the bottom left of the topics menu.
Additionally, if you’re conducting legal research on HeinOnline, Westlaw, Lexis, or Bloomberg, the copy button becomes “Copy with Citation.”
For Westlaw, Lexis, and Bloomberg, this will open their copy with citation dialog box.
If you’re using HeinOnline, the text and citation will be copied to your clipboard. From here you can paste directly into any document. It is also important to note that you will need to change the image to the document’s text using the paper icon in the HienOnline image toolbar. Then, highlight the text you want with PowerNotes and either save it by selecting a topic or copy it with citation.
 Staying Organized
Staying organized happens almost automatically with PowerNotes. Your research is gathered and organized simultaneously so that PowerNotes can build your outline for you as you go.
PowerNotes uses topics to keep your research organized. Highlighted text needs to be put into a topic to be saved. Think of topics as the headers and subheaders of your research paper or types of activities in a travel itinerary.
You may not know what your topics will be when you start your research, so PowerNotes makes it easy for you to add and edit topics as you go. You can quickly add a topic as you research by clicking on the “+” icon at the bottom of the topics menu that pops up after you highlight. So as your knowledge of the subject matter increases, you can reorganize your research accordingly.
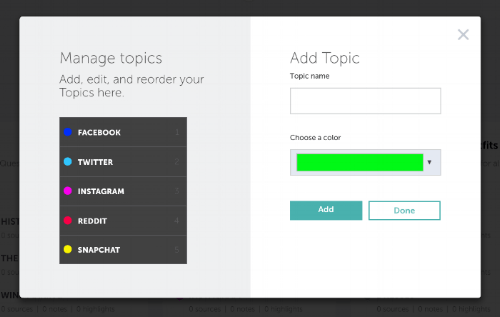
You can manage your topics by clicking on the “gear” icon at the bottom-right of the topics menu. This will bring up the topics settings page, where you can:
- Add a topic: enter the name of the topic, choose a color (or just accept the default color), and click “Add”
- Edit an existing topic: hover over a topic and click on the “pencil” edit icon, change the topic name and/or color, and click “Update”
- Reorder topics: drag and drop topics
- Delete topics: hover over a topic and click on the “X” icon
Tracking Your Progress
The PowerNotes Extension sidebar lets you visualize and access the research you have already gathered. It contains a running tally of all the snippets you’ve captured for a given project. So you can use the sidebar to stay focused on the current topic you are researching.
The content in the sidebar is organized by topic. You can:
- Expand or collapse all snippets in a topic: click on the up or down arrow to the right of the topic name
- Edit notes: click into the notes box (saving is automatic)
- See how many snippets are in each topic: look at the number next to each topic
Clicking on an existing highlight on a webpage brings up the notes box so you can delete the highlight or edit the note.
There are 3 different ways to view the content in the sidebar:
- Show all: allows you to see all snippets for all topics (default)
- Current page: allows you to see all snippets for the current web page
- Topic summary: allows you to collapse all of the snippets in all topics, which comes in handy when you’ve done a lot of research
You can expand or collapse the sidebar by clicking on the PowerNotes icon (to expand) or “minimize” icon (to collapse) in the lower right of the browser window. You can also adjust the width of the sidebar and move the minimized sidebar around your screen if it’s in your way.
It’s also easy to enable or disable the highlighting function of the PowerNotes Extension by clicking the PowerNotes icon on your Chrome toolbar.
Reorganizing Your Research
Once you’ve gathered some research, head to the project outline where you can reorganize and refine the research you have already done. The project outline puts all of the content that was in the extension sidebar on a full screen so it is easier to manipulate.
To access the project outline, click on the “Project Outline” link on the right side of the top of the extension sidebar. You will be taken to our website where you can reorganize snippets, filter topics, edit your notes, and download all your research.
Content in your project outline can be manipulated in the following ways:
- Reorder snippets: to change the order of snippets just drag and drop them around or hover over the snippet you want to move and click on the ellipsis icon and select the “Move to Topic” option
- Delete a snippet: hover over the Snippet you want to delete and click on the ellipsis and select the “Delete” option (note that when you delete a Snippet, it’s gone for good, so do so judiciously)
- Add and edit notes: to add a note, hover over a Snippet without Notes and click on the “+ Note” icon and to edit a note, click into the Notes box that you want to edit and start typing
- Manage topics: add, edit, and reorder topics by clicking on the “Topics” link above the list of topics (note that content under deleted topics will be moved to an uncategorized topic at the bottom of the project outline)
- Filter topics: click on the checkboxes next to the topics you want to see in the right-hand column of the project outline. The default filter shows you all snippets for all topics
Just click on the source link for any snippet and that page will open in a new tab. To view the date and time you captured a highlight, just hover over the snippet and click on the eye icon that appears after the highlighted text.
To rename your project, or edit the description, hover over and click into the section you want to edit.
To go to your projects dashboard to access or create other projects, click on the PowerNotes logo in the upper-left of the project outline.
Managing Your Projects
Projects are the highest level of organization. You will probably want to have a different project for each research paper you are writing or travel itinerary you are planning. The first time you sign up, you will have a default project called “New Project” to start playing with.
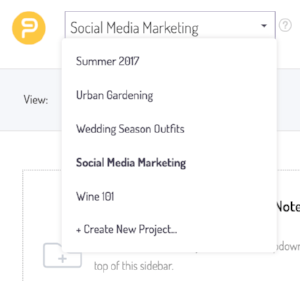
If you’re working on multiple research projects, you can quickly switch projects by selecting it from the dropdown menu at the top of the extension sidebar next to the PowerNotes logo. You can also quickly create a new project by selecting the “Create New Project” link at the bottom of that dropdown menu. All content and topics in the extension sidebar will change to match the selected project.

Clicking on the PowerNotes logo at the top of the extension sidebar or on a project outline will take you to the project dashboard, where you can access all project outlines and create new projects.
As you create additional projects they’ll populate your projects dashboard. To access a project outline click on the project title. You can also delete projects by hovering over the project on the project dashboard and clicking on the trash can icon underneath each project card. You can also access the topics modal for each project by clicking on the “+” icon underneath each project card.
To access PowerNotes, please click here.